Hello friends and followers,
Thank-you so much for visiting my site. Knowing you are out there is what gives me the oomph to keep posting. I appreciate your support so much.
I just want to let you know that I haven't dropped off the ends of the earth. I have moved my blog to WordPress (with the help of two wonderfully tech-savvy people - thank-you Tammy and Clay!) and am now posting from there. You can find it by going to http://www.kitchenfrau.com/ .
But please bear with me, the new site is just bare-bones at present and I am still trying to figure it all out. It will look better eventually - I promise. I just wanted to get at least one post up before Christmas. I will get it polished up in the New Year.
Merry Christmas and best wishes for a joyful and restful holiday season.
See you over at my new site,
Margaret
Thursday 22 December 2011
Thursday 8 December 2011
Peanut Brittle Cravings

I went on a brittle bender. I wasn't meaning to, honest. It's just that with brittle, it's addicting.
And it was beautiful and snowy outside and Bing Crosby was crooning White Christmas inside and every time I opened my deck door to give the dog a treat, the jingle bells hanging from the handle jingled in that Christmas way they have. And I was just going to whip up one batch of peanut brittle.
One quick little batch.
With this super easy recipe I have, that would have taken only 10 minutes - 15 minutes tops. But the Christmas spirit hit, and about 8 batches later I wiped my brow and looked up and realized I'd done it again - gone on a Christmas baking bender - a peanut brittle bender. The only thing that stopped me was a shortage of nuts. (Stop laughing).
But I did have containers full of crunchy, caramel-coloured pecan brittle, and pumpkin seed brittle, and macadamia-poppyseed brittle to show for it.
Oh, and of course, peanut brittle.
If there's any left by Christmas, it'll make great gifts.
Years ago, before I had this recipe, I was scared of peanut brittle, because it involved candy thermometers and much stirring and holding of breath and maybe even some bad words. But then my friend, Wendy, passed on her easy microwave recipe and I've been making it ever since. It always turns out. It's light and crunchy, not tooth-breakingly hard, and you can use any kind of nuts you have on hand.
This year I also tried a few batches with brown rice syrup for my corn-allergic daughter and they turned out great. When I ran low on brown rice syrup I even tried one batch with half brown rice syrup and half agave nectar and it turned out, too. And in that batch I used coconut oil instead of butter. My son proclaimed it tasted like Werther's Original candies. (I had to hide it from him.)
Is that versatile or what?
This recipe looks like there are a lot of stages, but is quite simple, really. It goes into the microwave three separate times. Make sure you have a trivet to set the dish on, use oven mitts to avoid burns and have a plate on the counter to set your stirring spoons onto, as the candy hardens up quickly and sticks to everything.
The dishes easily come clean if you soak them for a while.
*When I ran out of salted nuts and used unsalted, I sprinkled the top of the hot brittle in the cookie sheet lightly with Maldon flaked sea salt, and that won rave reviews - so much so, in fact that I was requested to sprinkle it onto regular batches next time. Kind of like salted caramel. Mmmm.

Peanut Brittle (or Nut Brittle)
1 cup (240ml) sugar
1/2 cup (120ml) white or light corn syrup (or brown rice syrup)
1 heaping cup salted peanuts (or other nuts or seeds, salted or not)
1 tsp (5ml) butter (or coconut oil)
1 tsp (5ml) vanilla
1 tsp (5ml) baking soda
Grease a cookie sheet with butter or cooking spray. Set onto a cutting board or mat, to protect your countertop, as it will get very hot.
1. Put sugar and corn syrup into a 1 1/2 quart glass bowl or casserole dish (with handles is better and safer). Stir until combined and microwave, uncovered, for 4 minutes on high.
2. Remove from microwave and add the peanuts, stir quickly, and microwave again for 3 to 5 minutes, until light brown. (This will depend on your microwave - in my microwave it takes 4.5 minutes). Don't stir during this time - just watch it.

3. Remove from microwave and stir in butter and vanilla. Microwave a final time for 1 to 2 minutes, until a deep golden brown colour (on my microwave that is 1 1/2 minutes).


Pour quickly onto the greased cookie sheet and lightly spread around just a bit to even out the thick spots - try not to muck around with the foam too much as that is what makes it light and crispy. The mass will not spread to the edges of the pan. Just leave it as a puddle.

Cool 1/2 hour until no longer warm and break into pieces by lifting the hardened puddle and breaking off pieces with your hands or leaving it in the pan and tapping lightly with the tip of a knife. Wipe each piece with a paper towel to remove crumbs and grease.

I'm guessing Santa might even like this better than cookies with his milk.
Wednesday 30 November 2011
Ode to the Lowly, Lovely Chayote Squash

I love hanging out with him. He's a cool and crispy guy. Fits into any crowd.
He's a member of the squash family, unassuming but surprisingly versatile.
I don't know where he's been all my life.
I've seen bins of Chayotes at the grocery store, over by the bitter melons and lemongrass and wrinkly, nobbly vegetables of unknown origin. I never knew what they were or how to use them.
Or how gosh dang delicious they were.

Chayote squashes look like green pears with funny, flattened wrinkly ends. Their skin is smooth and they have a soft pit in the middle that is edible, though you can cut it out for a more uniform look. When I did a little reading about them, I discovered they are a good source of amino acids and vitamin C. Wow. They can be eaten raw or cooked. Their taste is very delicate - a cross between a cucumber and a zucchini, but it is their texture that makes them so special - crisp and juicy. And amazingly, they retain that crispness when lightly cooked.
I discovered them last year, and am very glad I did.
I usually just saute them lightly in butter with a little salt and pepper. They are a great accompaniment to any meal. Chayotes originated in Mexico, but have been introduced and adapted to many parts of the world. My friend, who has moved to Canada from Mexico, has given me ideas for all sorts of other ways to eat this lovely vegetable, so as soon as I have tried them out I will pass them on to you.
When you find some smooth, firm, fresh-looking ones, buy a few extra - because they keep, loosely wrapped in a plastic bag, in the refrigerator for a month.
Sauteed Chayote Squash
2 medium chayotes
2 tsp (20ml) butter or oil
salt and pepper to taste
Cut the chayotes in quarters lengthwise. (If they are older or a bit tough, you can peel them with a vegetable peeler first, but I have never needed to do this). Cut out the soft core with a paring knife - kind of like coring apple wedges. Then slice the quarters crosswise into 1/4inch (1/2cm) slices.

Heat butter or oil in a heavy skillet over medium heat. Add chayote slices and saute, stirring occasionally, until tender but still crisp. This only takes about 5 minutes. Try to avoid browning the chayote.

Sprinkle with salt and pepper to taste and serve.
* You can also saute a little chopped onion with the chayote, or add a little chopped parsley a minute or so before they are done.
Serves 4
(To adjust quantities, allow about 1 chayote for every two people)
Saturday 26 November 2011
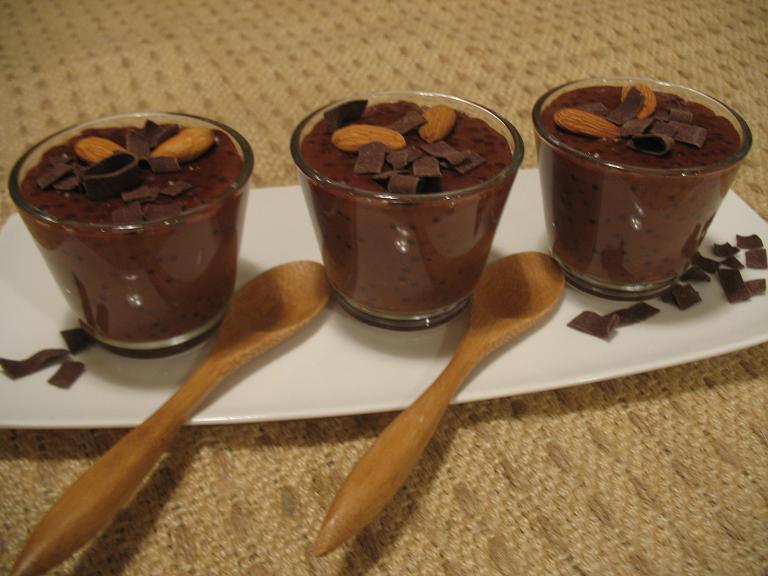
Chocolate-Almond Tapioca Pudding
Not that crunchy, sharp and intense can't transport one instantly back to a time and place that provoke wonderful nostalgic memories (like my oma's zingy stone-crock pickles or my mom's sharp cabbage-stuffed peppers), but it's just that you can only eat so much of them. They are like the exclamation point to a good meal - a little goes a long way.
When you think of comfort food, you want to be able to eat and eat and eat. Or at least think you could. And for me that means food that is not only related to good memories from the past, but also tummy-satisfying and fulfilling and soothing, yet flavourful. Food that wraps me up like a comfy blanket and makes me glad to be inside on a cold winter day. Food that makes me feel like a little child again, getting to say home from school because I am sick and allowed to eat a huge bowl of my favourite food, curled up on the couch and watching cartoons. Food that reminds me of a simpler, gentler time, when everything we ate came from the garden, the cold room, or my mom's kitchen. Not that we didn't sometimes make bright neon-coloured jello salads from mixes, or have tinned spaghetti in tomato sauce for camping meals, or fried bologna (pronounced baloney for some strange reason) sandwiches for lunch. But those kinds of meals were the exception in our house, and thought of as wonderfully special by my siblings and I.
We were blessed to have a German mother who made most everything 'from scratch'. Only as an adult do I appreciate what that really means, when in today's busy lifestyles it is so easy to open a packet or mix or pre-prepared meal. Sometimes now, I find it as comforting to prepare a food 'from scratch' as it is to actually eat it. The extra time is a loving labour, a chance to slow down and lose myself in what my hands are doing, to focus on the nourishment I am preparing. Stirring the pudding or the soup or the stew is a pleasure.
One of my comfort foods is tapioca pudding, even though we never actually ate it as a pudding when we were growing up. We only ate it as a breakfast porridge, soaked overnight, cooked in milk for a long time, and then only the large-sized pearl tapioca - the kind now used in bubble tea. (I can't imagine how early my mom must have got up to have it ready for our breakfast. It required a lot of stirring.) We called it Sago. We sprinkled it with sugar and cinnamon, and ate it in soup bowls.
So now, for me, any kind of tapioca pudding is a comfort food. And the luxury of eating it as a dessert? Wow! Double delight.
Add some chocolate. Even better!
Andreas polished off three of these puddings before I could even get the picture taken. For a fifteen-year-old boy who will voraciously eat anything without much discrimination, I was touched that he stopped long enough between mouthfuls to tell me how much he liked them and to request that I make them again.
I'll take that as a thumbs-up to this recipe. (Worth the stirring-time)
Chocolate-Almond Tapioca Pudding
1/2 cup (125ml) seed tapioca
3 cups (625ml) vanilla almond milk (or regular milk plus 1/2 tsp. vanilla)
1/2 cup (125ml) chopped dark chocolate or chocolate chips
1/2 tsp. (2.5ml) cinnamon
1/4 tsp. (1.25ml) pure almond extract
1/2 cup (125ml) whipping cream or coconut milk*
agave nectar or sugar to taste as needed*
chocolate curls and toasted slivered almonds for garnish (optional)
*I used Earth's Own Almond Fresh vanilla almond milk and found that it was sweet enough on its own and needed no additional sugar. Depending on the sweetness of the brand you use, you will have to taste and adjust the sweetening in the recipe. If you use regular dairy milk, you will definitely have to sweeten the pudding a bit.
*If you want to make a lighter version of the recipe (not nearly as much fun), omit the whipping cream or coconut milk, and just stir in another 1/2 cup of almond milk at the end.

Put the seed tapioca and the almond milk into a large saucepan. Bring to a boil over medium-high heat, stirring constantly, then reduce heat and simmer, stirring often, for about 20 minutes, or until half the tapioca beads are translucent. Some beads will still be white in the center, but they will gradually become clear as the pudding cools. Taste to be sure they are not still crunchy inside.
Remove from heat and add the chocolate, cinnamon and almond extract. Stir until the chocolate is evenly melted. Taste and add sweetener if needed. Stir in the whipping cream or coconut milk. Taste once more (such a chore).
Let cool 5 minutes, stirring occasionally, then pour into a bowl or individual serving dishes and cover with plastic wrap laid directly on the pudding to prevent a skin from forming on the top.
To serve, remove wrap, garnish with chopped toasted almonds and chocolate curls. (I only had whole almonds for the photo, but they worked, too.)

Ahhhh, comfort.
Thursday 17 November 2011
Purple Salad - a Touch of Color in a Winter White World

Our world is white.
Winter white. Clean and fresh and cold.


On Saturday morning we woke up to that first thrilling snowfall of the year. Even before I got out of bed and looked out the window, I could feel that the light outside was different. The world was bathed in a soft, bright white blanket.

There is a stillness to that new snow that muffles all the little snippets of sound floating about. It is quieter than quiet. Soft and hushed.

Comical even.

We basked in the excitement of the new season. The dog frolicked in the fluffy white stuff. We inhaled the cold air.

Everything so pretty and clean.
But then it got serious. Freezing cold. -16 degrees Celsius.
And today it blizzarded all day. The roads are terrible, snow needs to be shoveled, vehicles are sluggish, and snowpants and boots need to be dug out in earnest.
It has arrived.

I tried to capture the blowing snow in the photo. It didn't show up so well, but believe me it was there, stinging and sharp and real.
And when everything is so wild and white outside, I crave to be inside, measuring and chopping and cooking. And I crave color.

I make this often in the summer, and today I was trying to remember summer. It suddenly feels far away. (Was it really only a little over a week ago that my toes were digging in warm tropical sand?) This is really not so much a recipe, as a method - and a lazy one at that. It is my quick, last-minute salad.
Easy-peasy lemon squeezy. (I lie. You don't even have to squeeze a lemon for this one.)
My sister, Rosalinda, gave me the idea years ago. Four ingredients plus salt and pepper. Throw the veggies in a food processor, toss with dressing and salad's done. You can play with the amounts, throw in any ratio of carrot to cabbage. I just give measurements to start you off. I don't add any other ingredients, but you could add a bit of onion or apple or whatever. My family likes it with quite a tangy zing, so I use the three tablespoons of vinegar, but if you don't want it quite so cheek-puckery, start with two tablespoons and go from there.
Purple Salad
Serves 6
1/4 of a large head of red cabbage (about 1 lb. or 450 gms)
3 - 4 medium carrots (about 1/2 lb. or 225 gms)
2 - 3 Tbsp red wine vinegar
1/4 cup (60ml) olive oil
1/2 tsp (2.5ml) sea salt
1/4 - 1/2 tsp (1.25-2.5ml) pepper
Cut the core from the cabbage wedge, then chop it into a few large chunks. Peel and trim the carrots, then chop them into several large pieces.

Put them into the bowl of a food processor and pulse several times until a chunky uniform texture is reached. Careful though, one pulse too many and you have mush. This is really the only tricky part of this recipe. If your processor is not really large, process the carrots and cabbage separately, then combine them in a bowl. That way you will have more control. You don't want your food processor bowl more than 1/4 to 1/3 full, so you can control the texture. (If it's too full, you have mush at the bottom of the bowl and huge chunks at the top.) And if you don't have a food processor or mini chopper, shred the carrots on a grater and finely chop the cabbage.
Drizzle with the olive oil and red wine vinegar. Season with salt and pepper. Toss well and serve.

A hot colored salad for a cold winter day.
Wednesday 9 November 2011
A Taste of Sun and Some Flaming Guacamole

Warm sun. Palm trees swaying in tropical breezes. Turquoise waves rolling up on caramel-coloured sand.

That’s what I left.
Biting chill in the air. Leafless brown trees braving strong winds. Solidly frozen Jack-o-lanterns leering at me from the front steps.

That’s what I’ve returned to.
My week in Mexico on the Mayan Riviera seems like it’s a world away when I come back to the winter that is moving in, here in northern Alberta.
That is the way of holidays, isn’t it? No matter how amazing and wonderful the trip was, within a few days, sometimes a few hours, of returning home, it seems like you never left. The familiar surroundings, routines, and responsibilities of your life wipe those holiday memories into some hazy and hidden corner of your memory box.
Thank goodness for pictures. That's when it all comes flooding back. And I’m almost there again. On the beach. Listening to the waves crash. Nothing to do but hope the ice in my mojito lasts until the last sip.

Oh, it was a wonderful week. And exciting too, to be in Mexico during the Dia de Muertos (Day of the Dead). It’s not nearly as frightening as it sounds - actually three days of celebration, costumes, treats and people thronging the streets for la Fiesta.
At La Hacienda restaurant at our Aventura Spa Palace resort, we were served an appetizer of guacamole, prepared tableside by smiling Mexican waiters and doused with flaming tequila. It was as much fun to watch the process as it was to eat the creamy dip, the sharpness of the tequila marking a zingy counterpoint to the richness of the avocado.
Here is my take on that flaming Mexican dish - minus the flames. (You'll have to provide your own smiling waiters.)
Tequila Guacamole
2 ripe avocados
1 plum tomato, finely diced
2 Tbsp (30ml) fresh lime juice (about 1/2 large lime, or 1 regular one)
2 Tbsp (30ml) red onion, finely chopped
1 Tbsp (15ml) tequila
1/2 tsp (2.5ml) cumin
1/8 tsp (.6ml) cayenne pepper
1/4 tsp (1.25ml) sea salt
2 Tbsp (30ml) chopped cilantro
Tortilla chips, crackers, or cut vegetables for dipping
Cut the avocados in half, remove the pit and peel, and mash on a plate with a fork until chunky smooth.

Transfer to a bowl, and stir in the rest of the ingredients.

Serve with tortilla chips, baked pita chips, crudites, and of course - a shot of tequila.
Hola!

Friday 28 October 2011
Coconut and Curry Carrot Puree

Maybe later.
To me there's something elegant about purees. They seem to go with posh meals in fancy restaurants. . . elevating common vegetables to the status of gourmet foods.
Or maybe it's just the thrill of being able to legitimately eat what smacks of baby food, tweaked a little and promoted to sophisticated adult status.
(Transporting us back to the comfort foods of childhood.)

And if you can't, even regular carrots will be transformed to something magical in this comforting autumn side dish. If you don't have the time or the inclination to make the garnish, the carrot puree is quite wonderful on its own, as a side dish with pork or chicken. It's a quick everyday way to serve carrots. The delicate coconut flavour shines through and spooning up the soft puree is addictive.
However, if you add the garnish, the whole dish pops. The added flavours and texture of the crisped onions and pumpkin seeds make the subtle coconut and carrots sing.
Definitely good enough for company.
Coconut Curry Carrot Puree with a Pumpkin Seed Garnish
2 lbs. (900 to 1000gms) peeled carrots (start with more, to account for the lost weight of the peels)
3/4 to 1 cup (180-240mls) canned coconut milk (stirred first)
1 tsp. (5ml) curry powder
1/2 tsp. salt
Optional Garnish
1 Tbsp. (15ml) coconut oil or butter
1 cup (240ml) chopped onion, (1 small onion)
1/4 cup pumpkin seeds,
1 tsp. nigella seeds, or black sesame seeds, or regular sesame seeds
1/2 tsp. (2.5ml) cumin
1/2 tsp. (2.5ml) curry powder
1/4 tsp. (1.25ml) salt
sprinkle of cayenne
*nigella seeds are available at East Indian grocery stores
Cut the peeled carrots into large chunks and put into a saucepan. Add about 1/2" (1cm) water to the bottom. (If your carrots aren't really sweet, you can cheat by adding 1 tsp (5ml) sugar to the water.) Cover and bring to a boil. Turn down heat and simmer until tender, about 20-30 minutes.
Drain the carrots (don't wash the pot yet) and put into a food processor with 3/4 cup (180mls) coconut milk, curry powder and salt. Puree til smooth. Depending on the moisture in your carrots, add the remaining 1/4 cup (40mls) coconut milk until the thickness of the puree is to your liking. Return the puree to the pot.
Alternately, you can add the coconut milk, curry powder and salt to the drained carrots in the pot, and use an immersion blender to puree the mixture - less dishes to wash.
Reheat the mixture gently over low heat and serve as is.

Or
(while the carrots are cooking) Make the Garnish:
In a small frying pan heat the coconut oil over medium-high heat. Add the chopped onion and saute, stirring occasionally, until the onion starts to turn a nice dark brown at the edges. Just watch that it doesn't burn.

Add the pumpkin seeds and saute for another 5 minutes, until the onions start to get crispy and you hear the occasional pumpkin seed pop. You're aiming for flavourful, nicely browned and caramelized onions and toasted pumpkin seeds.
Stir in the nigella seeds, cumin, curry powder, salt and a sprinkle of cayenne. (You just want a mild nip here, so as not to overpower the delicate carrot flavour.)
Saute, stirring constantly, for another minute or two to bring out the flavour of the spices.

Sprinkle the garnish over the carrot puree or serve in a separate bowl and let your eaters add it at the table.
Serves 4 to 6.
Subscribe to:
Posts (Atom)